


Adobe XD is a web design and UX tool that lets designers mock-up and prototype websites and mobile apps in one tool. It integrates with a catalogue of external plugins and other integral parts of the Adobe software family.
One of the common tasks is to create a button component that can be used to help users navigate through the design. When creating a component, it can be useful to have dynamic sizing/padding so that the size of the button changes when the button label is amended.
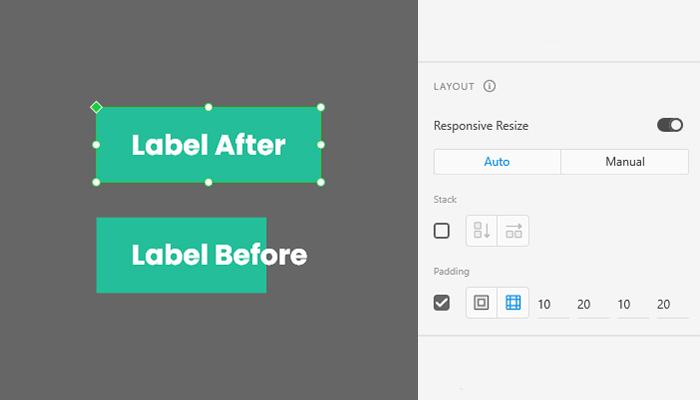
Button Before and After Dynamic Padding – Adobe XD
To create the dynamic padding, open up Adobe XD:
- Use the Rectangle tool to create a shape that will be the background of the button.
- Use the Text tool to add a general-use label in front of the button e.g. “Button Label”.
- Consider the spacing on the button by dragging and positioning the text as well as adjusting the height and width of the background. Take note of the spacing values around the text.
- Group the two layers together by selecting the layers and clicking CONTROL + G / COMMAND + G.
- Rename the grouped layers to a useful name such as “Primary Button”. Convert the folder to a component so it can be used elsewhere in the design file by clicking CONTROL + K / COMMAND + K.
- Select the new group layer/component and go to the Layout menu on the right of the screen. Then check the Padding box and make sure the padding values are as expected (top, right, bottom, left).
- Change the label text and the size of the button will adjust automatically.
What’s the Chat?